


My name is Jo, and in 2020 I moved to France with my husband, Brian. From our move to France, to running our B&B, my blog, which you can read below, is a diary of ‘Our French Adventure’. I share short stories about the Champagne region, and its people, and the life we have embraced here.
The second door
After spending a long time putting up the first door, trying to understand how it all worked, it was surprising how fast the second door went up. I literally only nipped out to get a few groceries, when I came back it was in place.
Obviously Brian had learnt so much from the first one that it made the second so much easier. That meant that he also had time today to look at the lock.

I keep thinking the doors are finished, but they still need to go out to the workshop for little jobs. This time it was for the holes to be cut for the key and handles.

I must say the lock looks magnificent, it was definitely the right purchase.
All that was left was to rehang it.

Gosh, it looks so different from inside the bibliothèque.

And just perfect from the salon. Hoorah!
Waste not
Paint in France is quite expensive, and I do love the Farrow & Ball collection, which is even more so. I find their finishes work really well in older buildings, and the colours and tones are complimentary for the traditional look we like. Our style is an eclectic mix of up-cycling and renovation, with sometimes modern, but often quirky elements included in the end result. This is definitely how the bibliotheque/study has developed. During our decoration of the space we have tried to reuse and up-cycle wherever we can.
Because I dislike waste, looking after our paint is a key priority for me, as a little bit of care with the paint tin can mean the difference between it being useable when you go back to it in six months time to do some touch ups, or it being past it’s best and ready to go to the déchèterie.
Some simple tips on caring for your paint are; Do not damage the lid – take care when opening the can, damage to the lid, means air will get in, and the paint will dry out. Do not damage the tin – this can cause leaks and rust spots. Always clean the top of the tin and the edge of the lid, so you are not closing the tin on paint that will dry and allow air in, which again will mean the paint will dry out. If you return to an old paint tin, and the paint looks a bit tired, give it a really good stir, and if it’s water based add a little water, you may be able to recover it. Oil based paints can sometimes be recovered with a bit of white spirit.

These simple little care tips after every use make it so much nicer to come back to your paints at a later date, knowing they’ll be good to use again.
Will it, won’t it?
Well, the waiting is over, it’s come to that time when we see if the doors actually fit. I’d like to say that this is the easy part, but the truth is it’s one of the most stressful, because Brian’s fitting traditional French hinges.

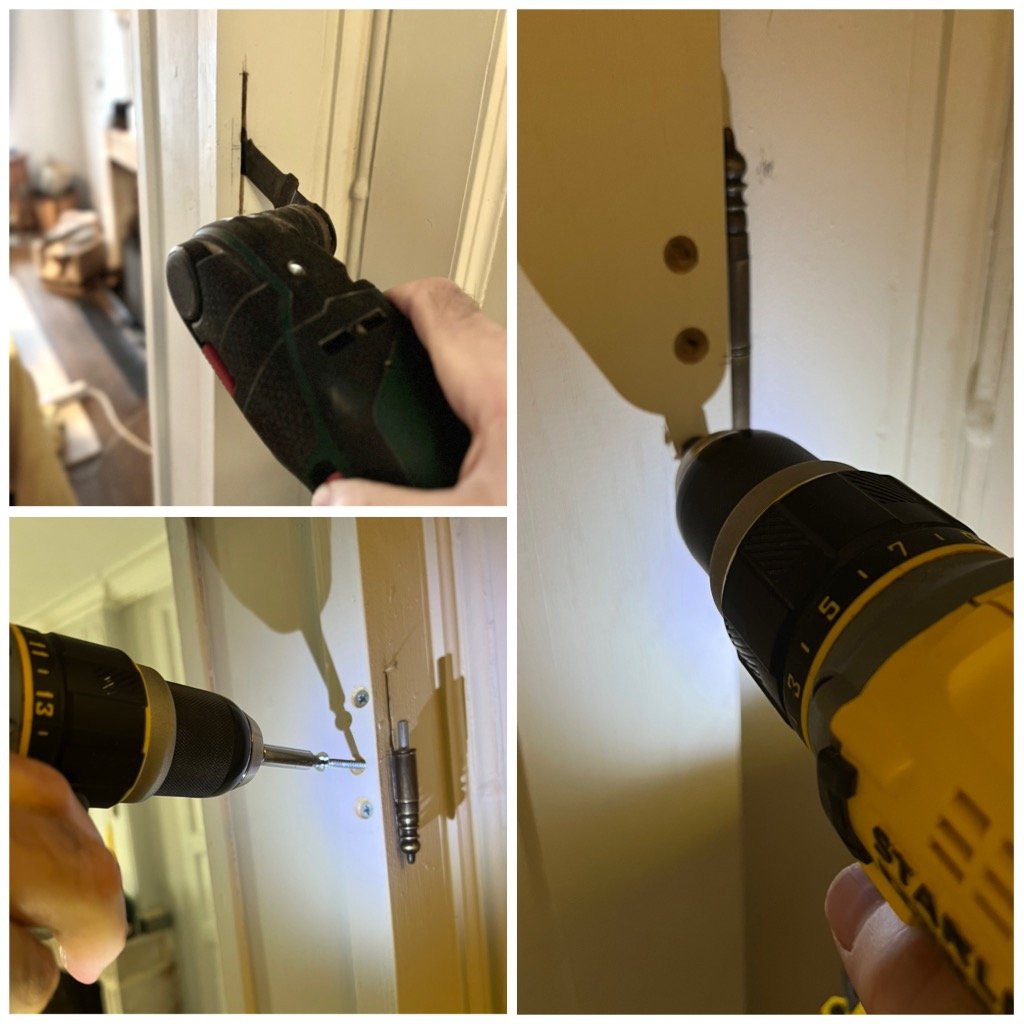
As always, it seems success is in the preparation, and even the marking of where the hinges will go is an important task.
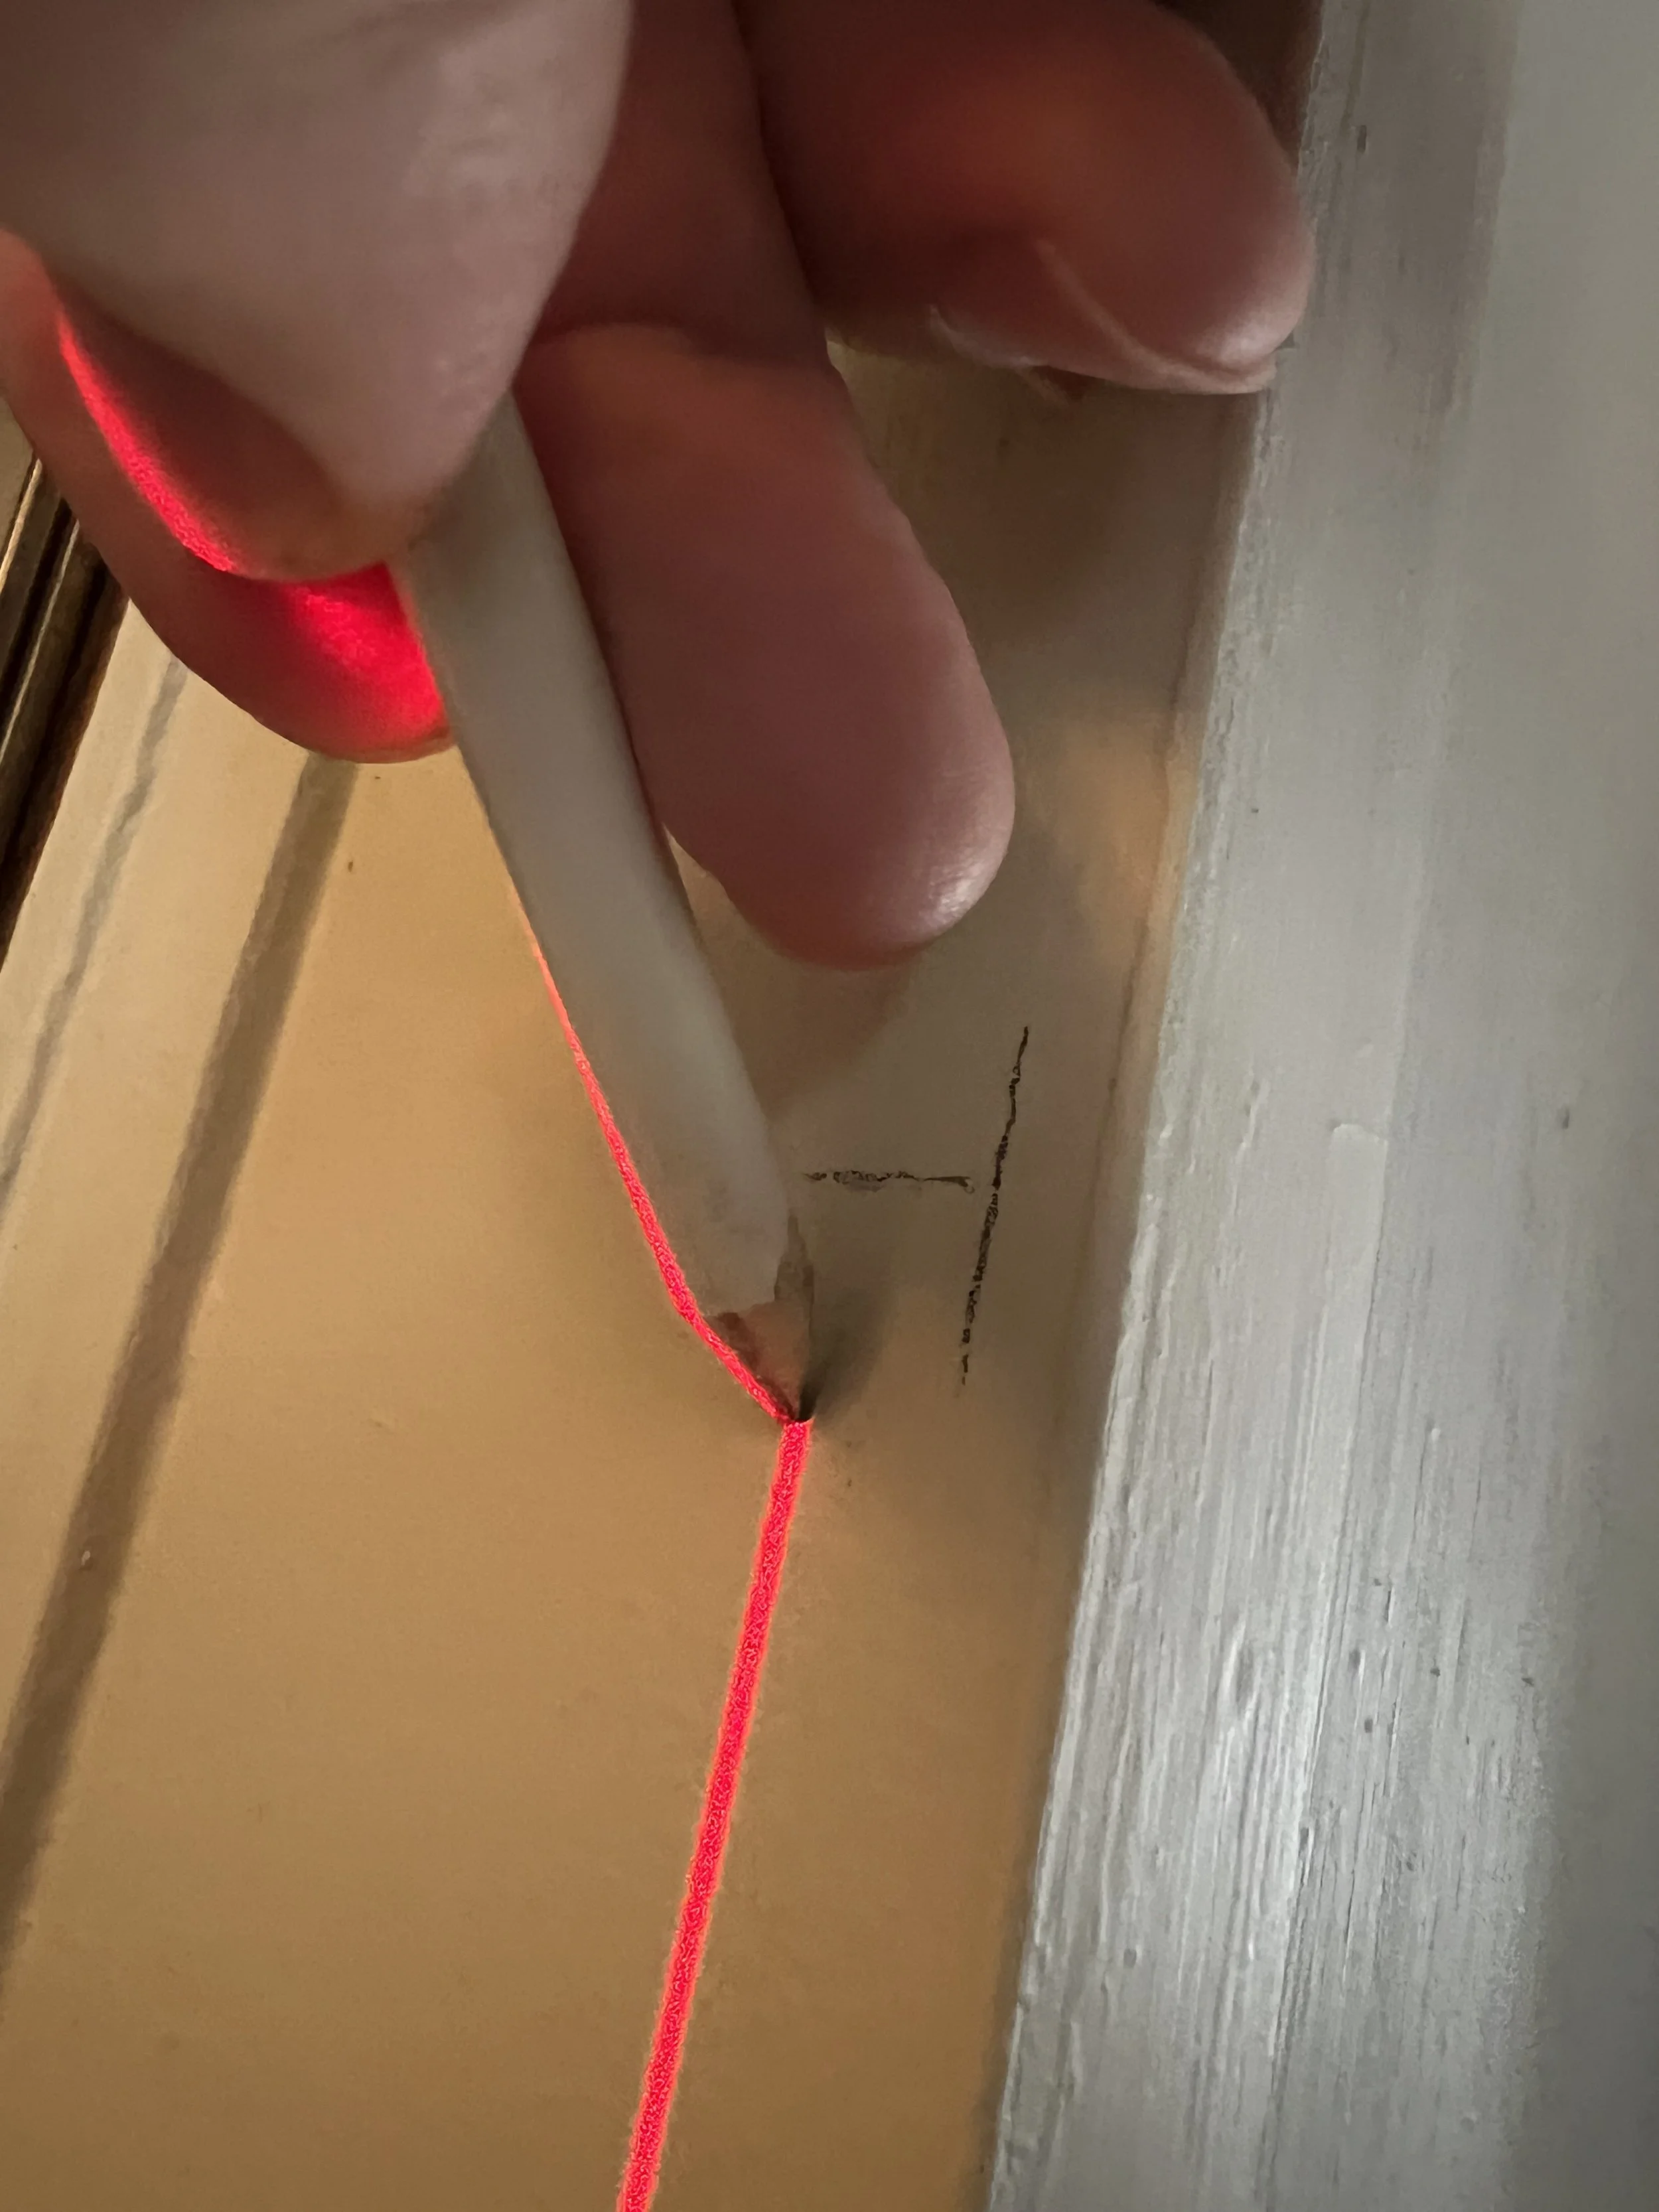
French hinges can fit into the wood of the door and frame, so effectively you do not see the supporting plate once they’re in, the only difficulty is that they’re not as adjustable as other types of hinges. All marked up though, and the first cuts are made.

Brian is quite nervous about the cuts, because they can’t be changed once they’re done, it’s a kind of one shot fitting.

One in place! We will need to fill the screw holes and touch up the paint work, but when finished you’ll never know the holes are there.
With the first pieces in the frame, the door will now have something to hang on. Just got to do the same for the door.


Final cuts made, just need to fit the second part of the hinge and he can hang it.
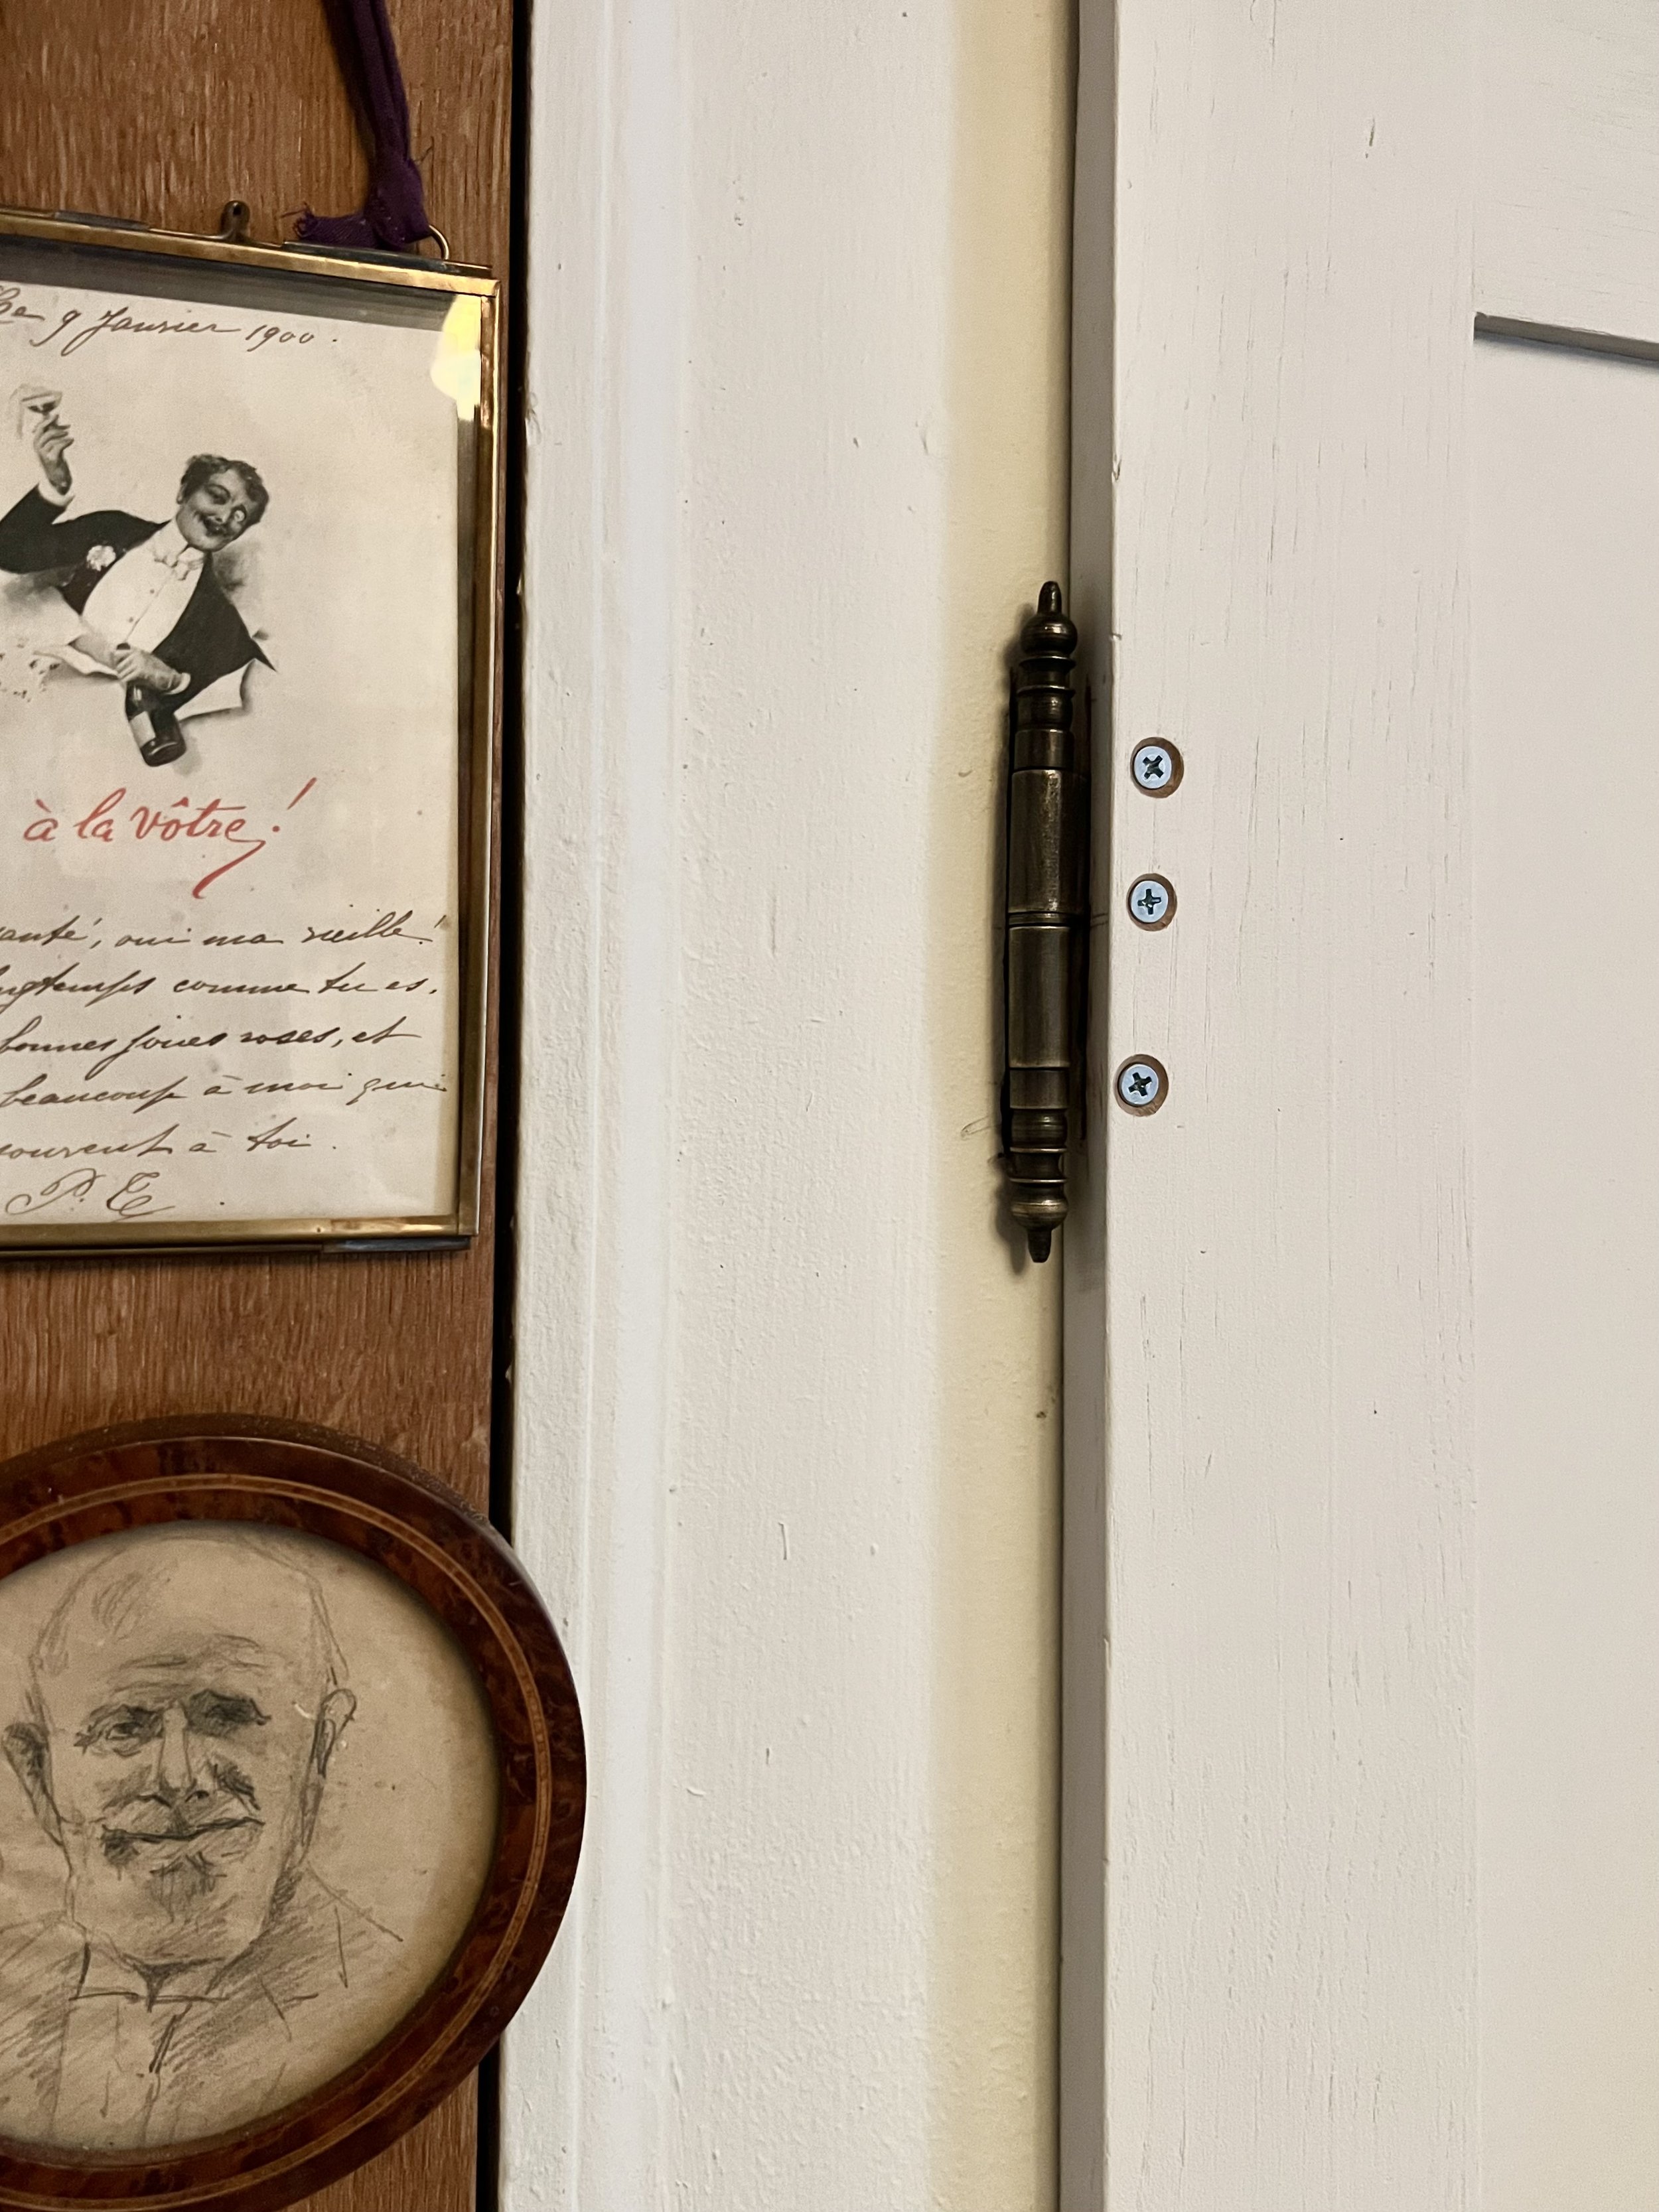

Voila! The door not only fits, it looks amazing.
Now he just needs to do that all again.
A game of cat and…
“There’s a pheasant in the garden”. “Where?” Brian replied.
Up on the slope, half way up to the pool, there was a magnificent, male pheasant. He was just strutting around, exploring his new discovery.
“Ooh!” Brian announced “There’s the neighbours cat creeping out of the trees”. “Little devil” I replied. It was definitely creeping, keeping low and only moving when the pheasant looked away. For a short while we both feared the cat was about to attack, but as it got nearer I think it realised just how big the bird was and its confidence eked away.

I think he was happy just to take a look, and the pheasant really didn’t seem very concerned either.
Layers
I’d been looking forward to getting started on painting the doors, and the day had finally come. There was a bit of a breeze, but the sun was poking its head up occasionally through the cloudy sky, and with a few layers on I was warm enough to enjoy the freedom of painting outside.

With the undercoat on one door, there was now time for a quick cup of coffee whilst the decorators caulk dried on the second one.
When I came back out, the wind had picked up slightly and we were conscious there may be a risk of some rain, so we moved me into the barn. The paint was going on really well, the colour I’m using is ‘blackened’ by Farrow & Ball, to match the panelling in the salon — a subtle grey tone which works well throughout the downstairs.

It really pulls them together.
Ta-da!
This is it! The last stage before painting. Today Brian’s cutting and fixing the inner panels to the doors, the final stage of creating them.

He worked out a radius for the corners of the panels that was in proportion to the ones already in the salon, then cut all the pieces to the sizes he’d worked out at the end of the day yesterday.

Dropped into position it was the first time I could really see the final idea coming together. It’s amazing how different they look with the decorative additions in place.

They’re clamped into position for a few hours before being finished with a little painters caulk to fill the edges.

And voila! They’re finished and ready for painting.

Privé
We were sitting enjoying our morning cup of coffee, and I happened to ask Brian if he knew when the lock for the library door was due to be delivered. Then, as if by magic, we heard a car radio outside the front gate and someone started to ring our bell — it has such a beautiful clang.
Brian jumped up and sped to the gate, never wanting to leave them waiting too long. ‘Hoorah’ I exclaimed ‘how spooky is that?’

It arrived in an overly large box, which meant it had been nicely protected.

We had looked for a reclaimed one, but hadn’t managed to find exactly what we needed, so we eventually chose an antique style made in the UK. Having it shipped had incurred import taxes of around £20, which had to be paid before they would deliver. We need to have the library private, as it will also double up as our office.
It’s so beautifully made, and I think it will work really well with the styling in the library. I cant wait to see it fitted.
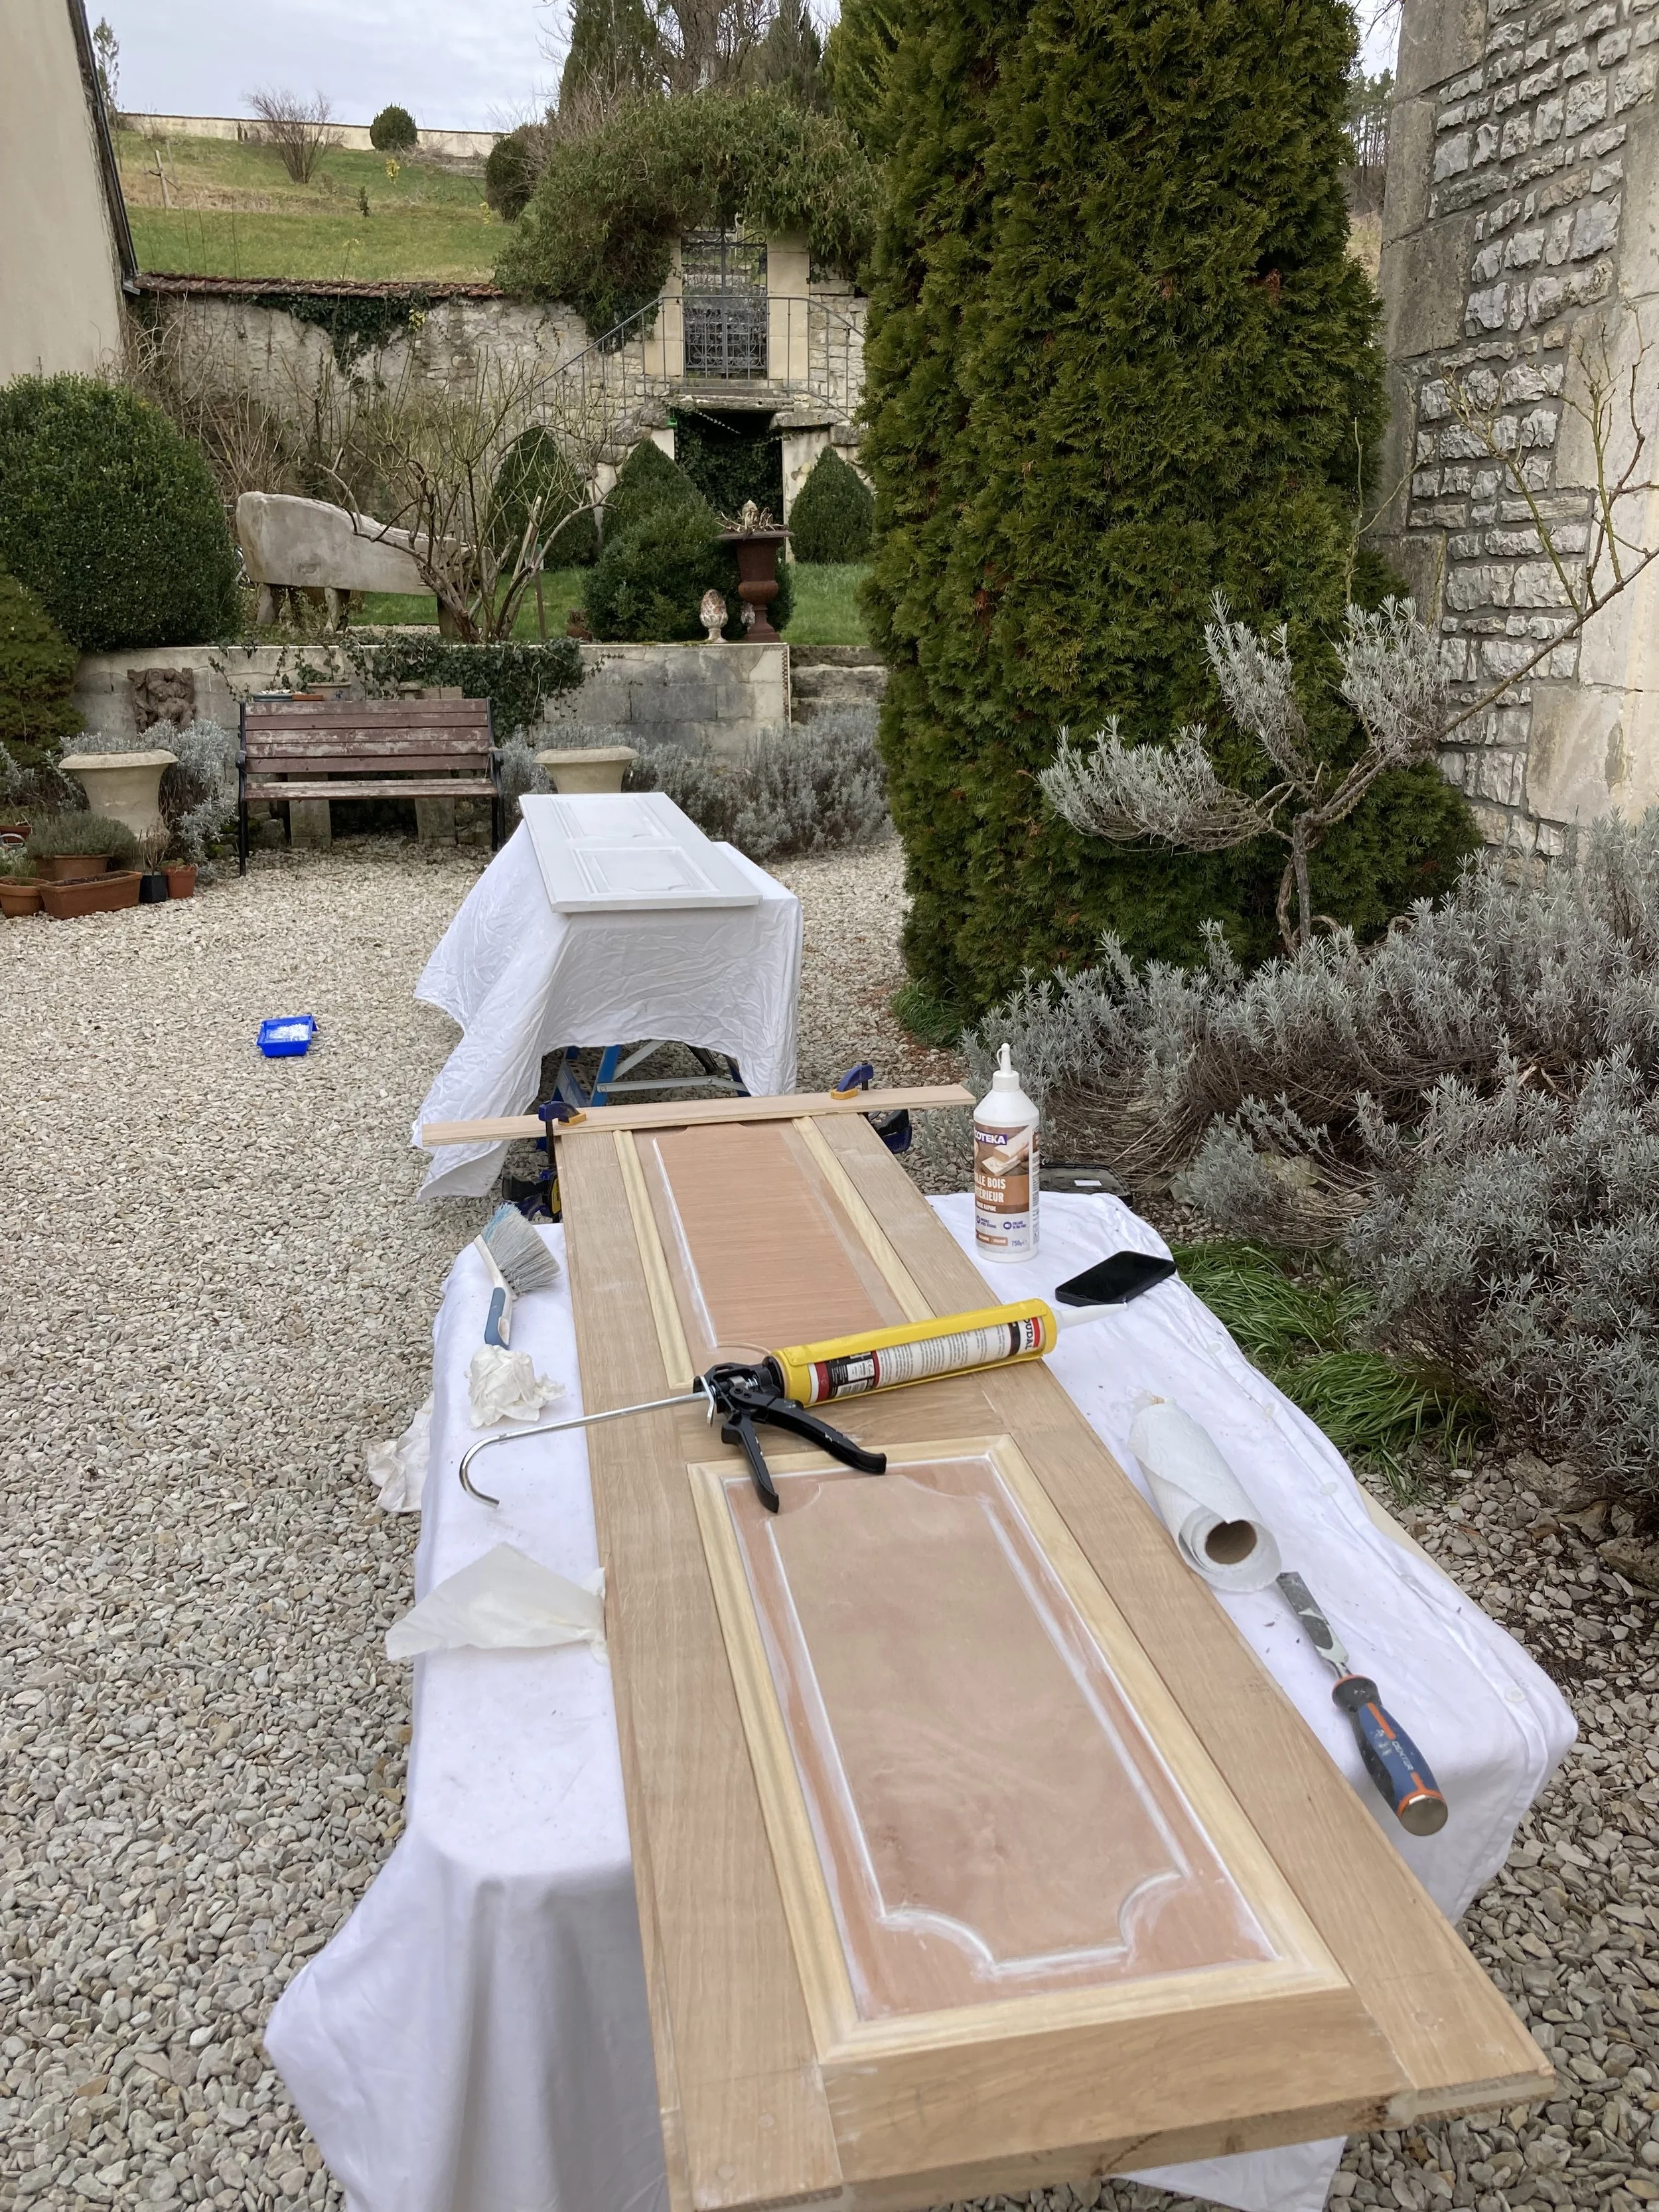
Nearly there
It’s a beautiful day, the sun is shining, the air is still and it’s about 15°c in the courtyard. After I’d done a little bit of admin I venture out to find that Brian has set himself up outside in the sun. These doors have seemed like quite a long job, with lots of different stages — more than I ever imagined, but they are finally coming together and looking like doors that will suit our house. That’s always the challenge when you build something from new to fit into an old house, is to get the balance of being new but looking ‘just so’. Today Brian’s adding the long-awaited trim to the inside panels, and I think it’s really completing the look.

He starts by cutting 45° angles in the moulding, measuring them to length against the door as he goes.

He has to do it to 16 strips in total, with 32 matching cuts, before gluing them all into place. Despite spending a lot of time in the Brico trying to select the straightest pieces of wood, some of them are a bit twisted and need help staying in place.

While he’s waiting for them to dry a bit he gets on with marking up the inner panel pieces, ready for the next stage.

He’s using a template that he cut to get the right form for the inner panelling. I’m getting very excited to seeing them completed and start painting.
Brico mania
We were having trouble finding suitable trim for the inside panel of the doors, so I suggested a little trip to Troyes. A friend had told us of a large ‘Brico’ (DIY shop) on the outskirts of Troyes, which I thought may be a good place to try.

The shop was huge, and packed full of useful hardware bits. We did manage to buy a few things, including a nice new garden broom, but unfortunately no trim. We did have another great find though, as next door there was a lumber yard and builders merchant which we could walk around and actually price the products on sale, which can be surprisingly difficult in DIY stores in France. This has always been the case at our local ones, where they seem to expect you to know what you want, and you need to order it from the counter, so it was great to be able to walk around. We found a whole bunch of wood and building products that we need to start the garden shed that I’d like.

Excited by our finds, and plans to return, we headed off to the Bricorama, another store just opposite this one, in the hope of finding the much needed trim. Success! They had a much better selection, and we were soon counting out how much we needed.
It was such a gorgeous day and, with our successful morning behind us, we decided to stop off for a bit of lunch at ’Feuillette’, before heading into the city centre for a little wander. Feuillette boulangeries and cafés can be found all over France, and they’re a great place for a snack.
It was nice seeing Troyes in the sunshine, although it was still very cold. We’d noticed a new flower shop had opened on the little street that has a couple of good brocantes and a coffee shop we like. It was very striking, and looked quite good value.

After completing our shopping tasks we needed to warm up, so we dropped into a pleasant little cafe for a cup of tea and a hot chocolate.

I had wanted to visit the Notre Dame exhibition at the cité de vitrail, but we both decided over our drinks it had been quite a long day, so we plan to return to visit it before it finishes on 9th March.
Spot the difference
I’d started the day by getting down to trim the lavender back in the courtyard. It is beautiful in the summer, the scent fills the air, and bees love to collect the pollen, but the underneath is getting rather woody and spilling into the courtyard a little too far, so a little haircut is definitely needed.

Spot the difference! There’s certainly plenty of lavender left, that will look gorgeous again in the summer, but I’ve revealed the edging stones beneath it, and also given the grape hyacinths some space to flower. Their little blue heads make a lovely display in spring.

In the afternoon it started to warm up, with beautiful blue sky and sunshine, so I kept going. I decided next on my list was the rose at the back of the house. There’s a bit of work Brian wants to do on the wall here, so to help with his access to this I need to prune the rose back. Brian came to help, as there are some pretty big branches to tidy up. First we got rid of all the dead and damaged branches, then looked at how we could shape it better and provide it more air. This is a beautiful white rose, which is nicely scented, so I really want to encourage lots of flowers. We shall see later in the year how that goes.

Little touches
One of our doors had been glued together and the clamps now taken off, so Brian had pushed ahead and filled some of the imperfections. Today, he wanted to get it into a near finished state.

After a good rub down with sandpaper, he turned his attention to the pegs for the corners of the frame. Even though the frame has been well fixed together there is always a risk that over time it will want to droop under its own weight, so to help prevent this Brian wanted to add some wooden pegs that would stop it from shearing.

It always worries me when he has to cut into something that already looks finished, but I know he wouldn’t do it unless he was sure of what he was doing.
The pegs are now in place, and once the glue has dried he will cut them off. It’s the little touches that make these jobs look so fabulous and I have to say it’s looking very authentic.

Bish-bash-bosh!
Yesterday Brian moved ahead with the doors, gluing the first three pieces of the frame together. It was exciting to see something finally forming, but it still seemed like such a slow process.

Today, with the first bit fixed, he was able to take the final measurements for the panels. He was very happy that they were exactly as per his original plan. With the measurements fixed, it didn’t take him long to cut all the panels to size, and moments later he was checking them for fit.

I didn’t know what the next step was, but before I could ask he was gluing everything together.

Then ‘Bish-bash-bosh’, we had one completed door! I was so surprised, but as Brian said “It’s all in the preparation”.

Coming together
With all the elements now cut, apart from the internal panels, Brian now needed to start to fix them together. The key thing was to ensure they were square, and to do any final adjustments before gluing. All the checks done, and a few edges trimmed slightly, he could now start gluing and clamping.

Because the weather is still quite cold, he had put some sheets down in the dining room to do the work, as we didn’t want to risk the glue not fixing outside. There are just three pieces he can put together at this point—they will become the frame for fitting the panels and the final gluing together.
I’m so excited now to see him bringing all the different elements together and seeing the doors as we envisaged them.

Cutting back
We were up early this morning, as we had to drop the car off for its service. As we were in town we headed along to the market to buy some fruit and veg. There weren’t many stalls there as it’s school holidays, and some of the stall holders are away, but luckily my local veg lady was there, and the man selling citrus fruit. We’re stocked up with fresh veggies and I got a few succulent clementines for the week.

We headed home in our little loan car, which always makes us giggle, as they’ve always got a lot of kilometres on the clock, and are a bit clunky, but we are so grateful to have it as it means we can get on with our day.

It was such a gorgeous day, I thought I’d make the most of it and made a start on some pruning. I have decided to cut the roses back quite hard this year, to hopefully promote some good fresh growth. We shall need to see how that goes.

Marmalade
Yesterday I did all the chopping for my marmalade, and left the peel soaking in the juice overnight. This morning I added 4 kg of sugar—I use confiture sugar, which just helps the set. The longer you boil a jam or marmalade the stickier, or more set, it will become, however it will also make it taste more caramelised, so you need to work out what you prefer. I often prefer a fresher, fruity flavour.
Once the sugar has been mixed in, and it feels like it’s all dissolved, you can start to warm it up. You need to achieve a rolling boil, which is so easy on an induction hob. I’d always been committed to gas previously, but the village isn’t plumbed in and I didn’t want tanks, so I reluctantly went to induction. It was a stroke of luck for me though, as I find induction so controllable and so easy to clean.
It takes anywhere between 20–45 minutes to achieve a setting point. Check this by placing a saucer in the freezer, then when you think you’re ready, take the cold saucer out and drop a bit of marmalade on it. If it wrinkles when you tip the saucer it’s ready.

I’d prepared my jars by washing them and popping them in the oven for 20 minutes. It was time to fill them, and seal the tops. For ease, I either use screw tops if I have them, or the rubber seals.

Once they’ve set, I’ll label them and store them in the cupboard to let them settle for a few weeks, but first I think I’ll be having a little on my toast, just to be certain it’s okay.
Bridle joints
So far Brian has cut grooves in all the pieces of wood for the doors, but I couldn’t see how they were all going to fit together. The answer is ‘bridle joints’, which will allow the ends to slot into one another and will make the door frame stronger. He drew a little picture to show me.

Apparently they’re not the easiest thing in the world to cut, but he said he could do half by table saw and half by hand.
The bits he could do by table saw are the male parts, which he does by adjusting the saw to the height of the cut needed and then passes the wood over it time and time again, moving it a fraction along each pass. It’s very time consuming, but faster, and more accurate, than doing it by hand.

The outcome looked pretty good.

He then had to cut all the female joints by hand, which took much longer.

He now has all the parts of the jigsaw. Can’t wait to see how it comes together.
Liquid gold
I was looking forward to making my marmalade. I had been reading about how the making of marmalade at home is a dying art, partly because Seville oranges are less prolific, but also because people just don’t seem to have time or the want to do it. I actually find it very relaxing and very satisfying. Maybe it’s because I love eating marmalade, and I’d much rather know that the marmalade I eat is made with organic oranges and lemons. Although I have to admit I do not use organic sugar.

Incidentally you won’t find ‘marmalade’ in France, here it’s called ‘confiture d’orange’, or citrus jam.
Unlike jam, you need twice the weight of sugar to fruit. I had approximately 2.2kg of oranges, and used 4kg of sugar, rounding the quantity down slightly for less sweetness. I also added three lemons, for a balance of acidity.
Start by cutting the oranges and lemons in half and squeezing out the juice. Then scoop out the remains of the fruit and pips and put all the pulp and pips into a piece of muslin cloth and tie it off.
You then need to slice the skins, thin or thick, however you prefer.
I’ve used quite large quantities, as I wanted to make enough for our summer guests, but halving the recipe should still give you six to eight pots and makes it easier to do. I use a large jam pot to prepare it all, but all you need is a thick bottomed saucepan with a lid.

Pop everything into the pan - juice, muslin bag filled with fruit pulp and pips, and the sliced skins. Then add some water, a litre per kg of sugar. I added four litres of water. Cover this and leave to soak overnight. This helps the skins soften, and they will be well distributed throughout the finished marmalade.
I have left mine on the stove to do its thing, ready to be cooked tomorrow.
Update
Having a presence online has massive benefits. Firstly, it enables us to reach so many people, which means my blog is read by people all across the world. It also means people can find us, just by looking at their phone or computer. Which is brilliant when you’re a small, boutique B&B in Champagne.

However the website needs regular care, as the platform we use is constantly being updated, which means adapting the website for the latest changes. It’s also important for us to keep our website current and fresh, to ensure our readers and visitors have a pleasant experience, and to make sure all the photos are up to date.
We will often chat between us, to discuss what’s needed; what works, what doesn’t work and what we’d love to do. Brian is the one who knows how it all works though, so, with some input from me, he takes care of it.
For a few weeks he has been wanting to move our site to an updated version that our platform had recently introduced. However, this came with a couple of worries, which I know had been playing on his mind. Firstly, would we lose all the blog pages? And secondly would the diary still work after the update? Both of these could cause a lot of heartache, and difficulty, but he knew it needed to be done. He’d had a few days working in his workshop on the doors, in the cold, so I suggested that maybe he has a change of scenery and spends the day working on the website. After a day of testing and checking, then changing things and testing again, the move over went pretty cleanly, apart from a few little things that need fixing. Phew!
A big thank you to those readers who have spotted a couple of issues for us. We really appreciate your input, and Brian is working to get them corrected.
Measure thrice…
The process Brian’s following for the doors to the library is to measure, create an accurate plan, cut important pieces, measure again and then cut the connecting pieces. It’s all very meticulous and makes the process quite slow, but he’s wary of making errors. Making a door like this is all new for Brian, and it’s so easy for it to go wrong, and not fit, so we’re happy for him to take his time.


Confident that the pieces he has so far are correct and match the drawings, he pressed ahead with cutting the other pieces.

He now has all the pieces he needs, he just has to cut all the bridle joints…I say just!

Edgy bits
Using the router properly for the first time was a bit daunting for Brian, but the pieces he did yesterday went well, and I think his confidence is growing. A quick check to see if the plywood will fit in the grooves he created also helped.

Happy that the grooves had worked he moved on to the channel around the edge of the doors. This is a typical old French way of overlapping the door to the frame, presumably to prevent light spill and drafts.

He didn’t want to take the router right to the edge at first, so he had to finish the ends by hand.


It was a bit slower, but he was happy with the outcome.
